Volume 10, No 2 - February 2005
|
|
Volume 10, No 2 - February 2005 |
|
|
|
|
|
| President - |
Vice President - |
||
| Treasurer - |
Secretary - |
||
| Webmaster |
Editors - |
||
| Founder - |
SIG Coordinators - |
Statement of Purpose
Membership is open to all those interested in machining metal and tinkering with machines. The club provides a forum for the exchanging of ideas and information. This includes, to a large degree, education in the art of machine tools and practices. Our web site endeavors to bring into the public domain written information that the hobbyist can understand and use. This makes an organization such as this even more important.
February Program
Members are invited to bring their steam engines or other items of similar size and complexity for a large scale Show and Tell. We will set up tables around the meeting room where each member will present his creation - a combination of a gun show type setup (without guns or sales) and a multi speaker program. Power for each engine - compressed air etc. - has not been worked out. Obviously we cannot use live steam inside the building. Members who will participate in the display are requested to contact the club Vice President, Doug Chartier, by email or telephone in regard to their display. email - phone: 281-530-4543.
January Regular Meeting
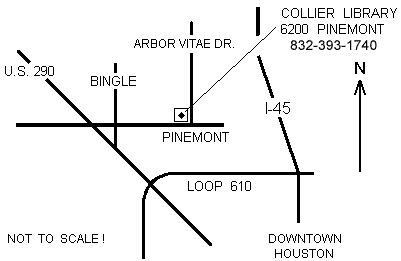
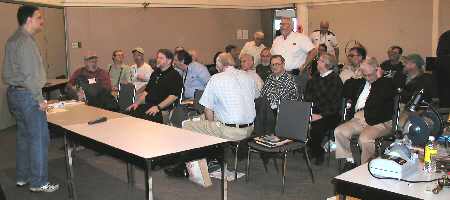 Collier Library, Houston Texas, January 8, 2005, 1:00 p.m., Chuck
West - President presiding. There were 36 members attending 3 Guests (how they
made contact with HMSC). Gayle Hopson (Internet), Mack Debose (word
of mouth), George Carlson (previous member).
Collier Library, Houston Texas, January 8, 2005, 1:00 p.m., Chuck
West - President presiding. There were 36 members attending 3 Guests (how they
made contact with HMSC). Gayle Hopson (Internet), Mack Debose (word
of mouth), George Carlson (previous member).
Business Meeting
Minutes are sent via email or regular mail to club members.
Presentation

 The
presentation this month was by Ryan Ober of Ober & Sons Welding.
Dealing in
industrial,
structural, ornamental welding since 1982, they have since grown to 14 employees.
Ryan passed around a note book of his brother's metal art work and some photos
of a recent structural welding job. He went on to discuss the various welding
methods and techniques they uses in their work. During the presentation he
took questions from the club members.
The
presentation this month was by Ryan Ober of Ober & Sons Welding.
Dealing in
industrial,
structural, ornamental welding since 1982, they have since grown to 14 employees.
Ryan passed around a note book of his brother's metal art work and some photos
of a recent structural welding job. He went on to discuss the various welding
methods and techniques they uses in their work. During the presentation he
took questions from the club members.
 Richard
Pichler did an excellent video presentation demonstrating layout using the front step on an inexpensive
dial calipers to transfer distance and a needle mounted in a pin vise as a scriber.
Richard
Pichler did an excellent video presentation demonstrating layout using the front step on an inexpensive
dial calipers to transfer distance and a needle mounted in a pin vise as a scriber.
Special Interest Groups Activity:
Novice SIG
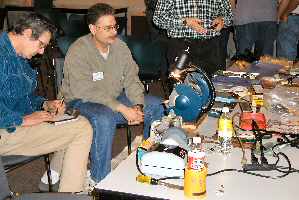 The novices explored
Rich Pichler's sharpening equipment. It was emphasized that grinding
and sharpening must not overheat the metal. You can avoid drawing the temper
out of the stock by using slow speeds, water cooled abrasives, or hand holding
techniques to sense overheating. Take your time when sharpening. They sharpened
high speed lathe bits and observed the face angles on large sized bits. The suggested angles came from the "Machine Tool Practices" notebook. Sharpening
chisels (wood and metal) was demonstrated along with several tool holding fixtures.
By shaving a pine wood block, the difference between a sharp and a dull
chisel was demonstrated. A flat blade screwdriver was hollow ground
to get a snug fit to prevent raising a burr on a screw slot. Dressing of a grinding
wheel was demonstrated
The novices explored
Rich Pichler's sharpening equipment. It was emphasized that grinding
and sharpening must not overheat the metal. You can avoid drawing the temper
out of the stock by using slow speeds, water cooled abrasives, or hand holding
techniques to sense overheating. Take your time when sharpening. They sharpened
high speed lathe bits and observed the face angles on large sized bits. The suggested angles came from the "Machine Tool Practices" notebook. Sharpening
chisels (wood and metal) was demonstrated along with several tool holding fixtures.
By shaving a pine wood block, the difference between a sharp and a dull
chisel was demonstrated. A flat blade screwdriver was hollow ground
to get a snug fit to prevent raising a burr on a screw slot. Dressing of a grinding
wheel was demonstrated
Two novices received the Houston Home Metal Shop Club "Machine Tool Practices " notebooks.
Next month Dennis Cranston will demonstrate his computer controlled milling machine to both the CNC SIG and the Novice SIG. - by Rich Pichler
Casting SIG
 The
Casting SIG discussed bad casting days.
The
Casting SIG discussed bad casting days.
Show and Tell
|
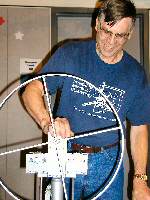
George Carlson showed a home built ring roller (slip roll for narrow width stock) he made and some samples of work done on it. |
Joseph Scott showed a quill bracket for attaching an air grinder to his mill-drill and discussed transferring an angle from a sine bar to a part in the mill vise. He also showed a small shop made collet for holding small diameter parts in a three jaw chuck. |
Ed Fuller talked about rifle bolt handle modifications to gain scope clearance. |
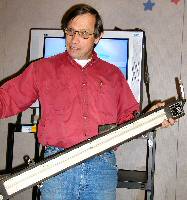
Doug Chartier showed his tool rack for a #30 taper tool holders. See the article below. |
|
Joe Williams showed some more before and after clean-up of rusty tools. Clean-up was done with a washing soda solution and a DC power supply. He also brought along a collet wrench for holding a 5C collet while tightening and loosening a collet stop. |
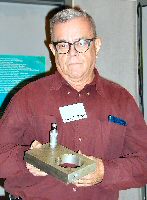
Van Harper showed a dumpster diving treasure unknown. It was identified as an inclined manometer used for measuring very small gas pressures. |
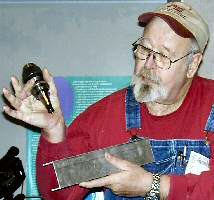
Dick Kostelnicek showed a face mask purchased on the web after seeing one after a trip to the dentist. They're cheap, reasonably effective, less likely to fog your glasses and also useful for making withdrawals at the local convenience mart. |
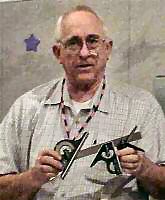
Joe Yeiser showed a small shop made rotary head. |
Featured Articles
Mental-urgy (Part - 3) Practical Metallurgy for the Home Machinist
by Vance Burns - HMSC Member
Note: All the items mentioned in this atricle are inherently dangerous, and will exploit any opportunity to maim you. Metal working is dangerous, and can not be taken lightly. All gasses and chemicals called out in this essay typify stored energy, and potential bodily harm. Do not proceed without consulting professionals in your areas of interest.
Metals have an attraction all their own, physical sciences with which we can truly grapple; man matches himself against the inanimate; the material succumbs, women swoon. Inevitably, the aspirant machinist runs the gamut of what can be done with this indifferent material. We are drawn, tentatively into the murky waters of heat joinery, often accomplishing much, thankfully unburdened with process nuances. Once we have done, the hunger yet remains. Unsatisfied with the now familiar, innate senses perceive what must be more; we yearn, not simply to change the face of the material, but touch it�s very spirit - then can they but call us gods?
Standing in good stead, it can not be argued that metal first met its match in a home shop, and the fundamentals of metallurgy were first forged out by one man on his own property, within his own domain; apologies ladies. It will stand to reason, we solitary soldiers, the novice and the hoary headed, can take on heat-treatment of steel.
As mentioned last column, heat is the tool of choice for manipulating this fundamental material property. Many methods of temperature elevation are available to the HSM, and fortunately elementary physics is still cheap! Obvious approaches are to have/build an occasional forge/furnace but these are unwieldy on a shop otherwise dedicated to well-oiled machinery. There is plenty of website fodder to escort you through construction of these items, however I would bring to your attention two considerations; One, forge/furnace & burner construction is a hobby in itself and some devotees tend to obsess; Two, this type of combustion breeds water vapor. This equates to a nice red patina on your Bridgeport. If you don't have pretty fair climate control in your shop - do this as man was meant, beneath the spreading chestnut tree. God can make a tree - he's probably not going to replace your shop.
There is lot to be said for two tank torch setups - acetylene has all the BTUs one could want - even to turning a promising piece into a puddle of tears. Propane is readily available, as is natural gas. Don't rule out coal, charcoal, and under the right circumstances, even wood. Blacksmith Tai Goo's Neo-Tribal Metalsmiths has a furnace plan that is mounded adobe with a sophisticated heating environment. Let your creativity run naked and free.
Certainly within the reach of anyone is the extremely economical one-brick forge, first designed by the now famous Wayne Goddard. It is simply this - one refractory brick with a blind hole drilled lengthwise. This is your furnace chamber. Make it as large as your brick will permit (woops! you bought two right?) and even oblong if it suits. The front entrance will be busy, yet we still need to heat the interior. A second hole in the brick side will work well, placed with intent on intersecting the existing cavity at a more-or-less right angle. A BenzOMatic hand torch placed near (not in) the hole can direct the luxuriant flame so that it penetrates the side orifice and licks lavishly about the shaft of the chamber. Goddard's very well illustrated book, "The $50 Knife Shop" is an excellent guide. Wayne welds in this brick-forge.
The question will inevitably arise - can one make a larger, yet inexpensive forge/furnace? Yes, and again, bricks are the simplest answer. You could go with furnace batting, and while not inexpensive, you don't need much. South Houston is covered up with Boiler/Furnace repair places, and most sell supplies; let your finger do the walking. Should you chose bricks � one might use those underfoot in one�s yard. Mandatory inventory of any home, one can usually secure enough to build a makeshift forge/furnace. Leave the inevitably damp bricks in the shop to sufficiently dry. The construction is obvious, so no elaboration is required but to point out three issues; violently escaping moisture is an unpleasant experience, non-fire rated bricks will not last - eventually spalting, and finally, this setup requires more BTUs since it will leak like a sieve.
FAQ: Will fireplace bricks work? Answer: If mud will work, your options are limitless.
Additional reading: http://www.anvilfire.com/21centbs/forges/microfrg.htm
Next month - Heat treating surprises!
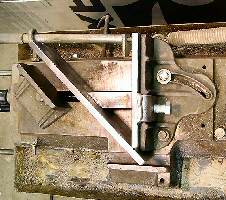
Miter Attachment for Horizontal
Band Saws
by George Carlson - HMSC Member
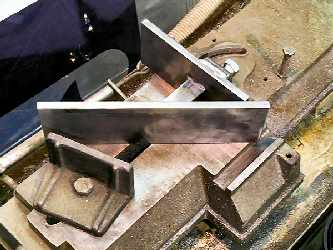
 I noticed a fixture similar to this, on eBay. It was being sold along with
a large Wilton horizontal saw. I have always hated to move the vise on my little
4x6� saw because it can be such a nightmare to get back to the 90 degree position.
This device has been a great help.
I noticed a fixture similar to this, on eBay. It was being sold along with
a large Wilton horizontal saw. I have always hated to move the vise on my little
4x6� saw because it can be such a nightmare to get back to the 90 degree position.
This device has been a great help.
The construction details will be determined by the design of your saw and the contents of your scrap box. But for my fixture I used 3/8 x 3-in. hot rolled steel. The fixture was designed to come within 1/16-in. of the blade. The back-plate is just slightly shorter than the back plate of the saw. This is to allow the front angle-plate of the fixture to come very close to the edge of the saw�s back-plate. This helps conserve space in front of the angle-plate to allow sawing of wider material. A bracket is welded to the back-plate that enables the fixture to be solidly clamped to the back-plate of the saw. Because the design of the vises vary, your clamping arrangement may have to be quite a bit different. For the most part, very little machining was needed, but I did surface the bottom edges of the front and back plates to make sure they were square to the face of the material.
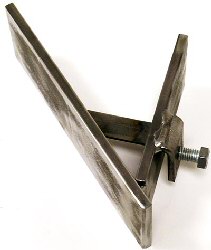
 The angle of the fixture is fixed to a precise 45 degrees using the welded
support. The welding of this support is quite tricky, so make sure the fit-up
is very tight. To do this I first welded the fillet between the front and back
plates. The two pieces were clamped down to a thick plate I use as a reference
surface. The angle between the two pieces was checked using the head of a good
combination square. The fillet weld acts as a �hinge� when setting up the final
support piece that locks-in the 45 degree angle. The support piece must
be fitted as tight as you can get it. This is because welds shrink as they cool.
If the fit-up is not tight enough, the angle will be less than 45 degrees. The
support could be made from two pieces of flat stock bolted together in the middle.
The support would be bolted together, welded in place, then the bolt loosened
and the fixture adjusted for precisely 45 degrees. One note, be careful about
using large welds on the support, the welds can cause the plates to curve inward.
This is do to local shrinkage of the plates where the welds are placed.
The angle of the fixture is fixed to a precise 45 degrees using the welded
support. The welding of this support is quite tricky, so make sure the fit-up
is very tight. To do this I first welded the fillet between the front and back
plates. The two pieces were clamped down to a thick plate I use as a reference
surface. The angle between the two pieces was checked using the head of a good
combination square. The fillet weld acts as a �hinge� when setting up the final
support piece that locks-in the 45 degree angle. The support piece must
be fitted as tight as you can get it. This is because welds shrink as they cool.
If the fit-up is not tight enough, the angle will be less than 45 degrees. The
support could be made from two pieces of flat stock bolted together in the middle.
The support would be bolted together, welded in place, then the bolt loosened
and the fixture adjusted for precisely 45 degrees. One note, be careful about
using large welds on the support, the welds can cause the plates to curve inward.
This is do to local shrinkage of the plates where the welds are placed.
Rotary Table-to-Lathe
Chuck Adapter
by Dick Kostelnicek - HMSC Member
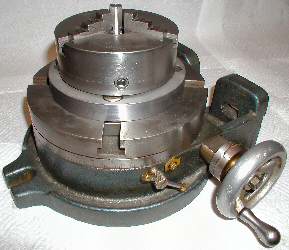
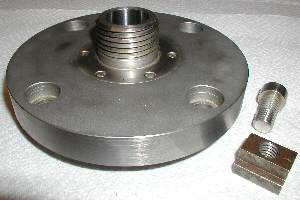 I
like to hold work that must be rotated or indexed around an axis in a lathe
chuck or attached to a lathe face plate. The chuck or plate is
fastened
to my rotary table by using a home made adapter (see photo at the right).
The work can then be machined or drilled in a vertical mill. The
nice thing about this arrangement is that the work, still mounted in the chuck,
can be transferred from the lathe to the mill and back again without losing
axial alignment.
I
like to hold work that must be rotated or indexed around an axis in a lathe
chuck or attached to a lathe face plate. The chuck or plate is
fastened
to my rotary table by using a home made adapter (see photo at the right).
The work can then be machined or drilled in a vertical mill. The
nice thing about this arrangement is that the work, still mounted in the chuck,
can be transferred from the lathe to the mill and back again without losing
axial alignment.
Years ago, I built this rotary table-to-lathe chuck adapter
(sorry, there are no drawings available). The round adapter base is made from 1-in. mild-steel plate. It
has four counterbored holes near its edge (see photo at the right) so that 1/2-in.
socket head cap screws can fasten it to T-nuts that fit in the T-slots
in the rotary table's top surface. Also fixed to the adapter is a 1-1/2-in
x 8 threaded projection that mimics the threaded chuck mount on my lathe's spindle.
The other side of the adapter has a round projection (see lower photo)
that fits snuggly into the center hole of the rotary table for axial
alignment.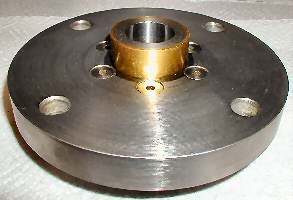
Quick
and Easy Mill Tool Holder
by Doug Chartier - HMSC Member
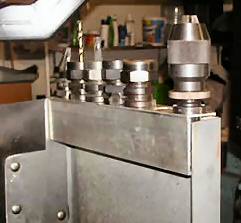
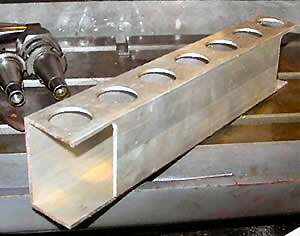 Simple
as dirt, easy to make, cheap and best of all IT WORKS !
Simple
as dirt, easy to make, cheap and best of all IT WORKS !
I got tired of running to the tool cabinet every time I needed a different cutter. Me running? Now that's a laugh! A piece of scrap 2x3-in. rectangular aluminum tubing did the trick. It will sit on the mill table, on or in the tool cabinet for easy replacement of needed tooling or hang on the top of the table enclosure. The solid wall of the holder facing the mill table also protects the shanks of the tool holders from chips and dirt. It has seven holes for tools - enough to hold tools that are used on multiple jobs (drill chuck, etc.) as well as tooling specific to the job being done. Besides being cheaper than buying a tool cart, it is more handy.
This idea can be adapted to any milling setup. Why buy an expensive tool
caddy or tool cart when you can make one in about a half hour that moves easily,
hangs conveniently and is always right where you need it? Find a place or series
of places and measure the length of the shortest. Determine the diameter of
your tool holder. Divide the shortest length by that diameter and subtract a
hole or two from the result to find out how many holes you can cut. Cut them
equal distance apart, and cut a slot at the bottom rear edge to overlap any
vertical wall where the holder can hang. That's all there is to it.
|
Visit Our Home Page at |
 |
Right
click below then select [Save Target As..]
From Netscape select [Save Link As..]
Microsoft
Word version of this newsletter 355 KB